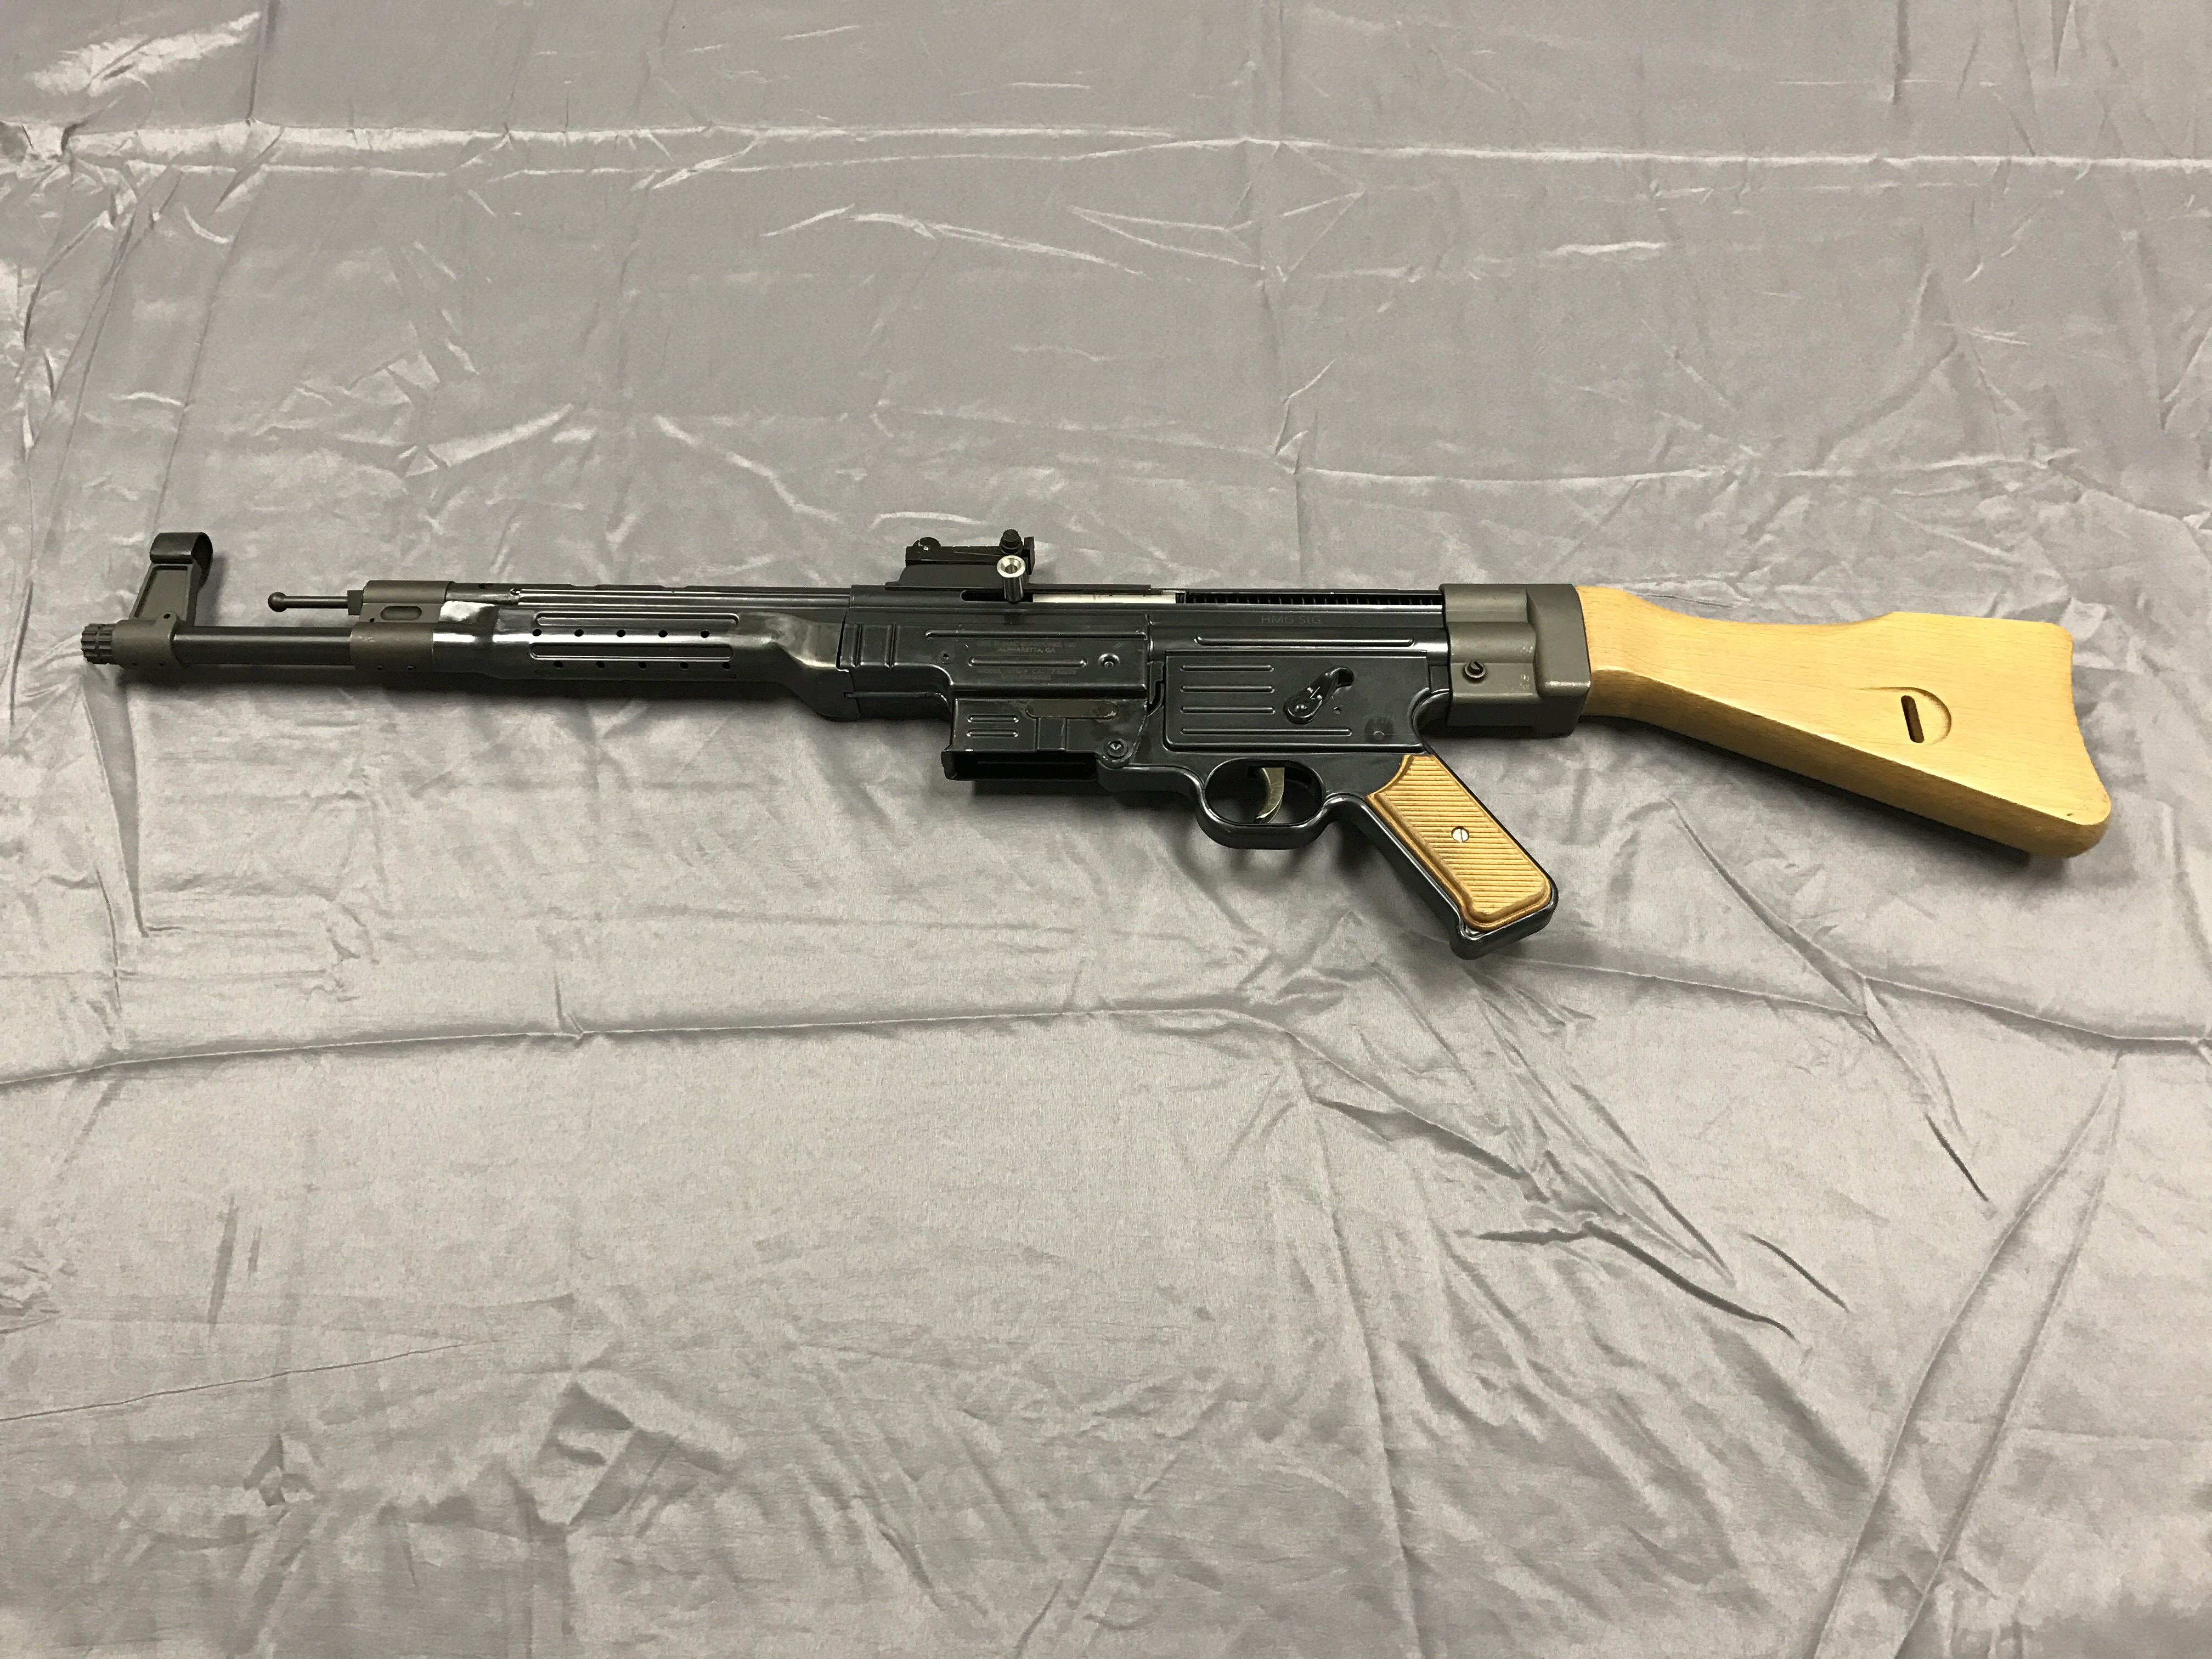
Post Dec 02, 2016 by HMGTravis
Hello again! Apologies upfront for the skipped update last week (the sheer amount of turkey, ham and pie ingested is to blame). We are back at it though and this week I want to talk about the StG Caliber Conversion Kit. We have gotten a lot of messages on Facebook, telephone and HAM radio asking “What are these dang conversion kits all about?” or ” The original StG couldn’t change calibers, what kind of space magic are you guys trying to conjure over there?” I can assure you the only magic that led to the creation of these kits is the sheer volume of coffee one human being can ingest in a 24-hour period (We try to answer the hard questions here at HMG™). Hopefully by the end of this you all will have a good grasp as to how this works.
It is true the original StG did not have the capability to change calibers on the fly. When we began the development process the biggest question on the white board was “What caliber do we offer?”. The easy answer was 8mm Kurz (7.92 x 33mm), but the issue with that was the availability. We want our customers to be able to shoot this rifle as much as possible and not have to take out another mortgage on their home to purchase ammo for a 3-gun match. Thus, began the process of seeing if it was feasible to offer the HMG StG™ in more popular and widely available calibers. We finally settled on 5.56 x 45(.223 Wylde), 300 Blackout, 7.62 x 39, and 7.92 x 33.
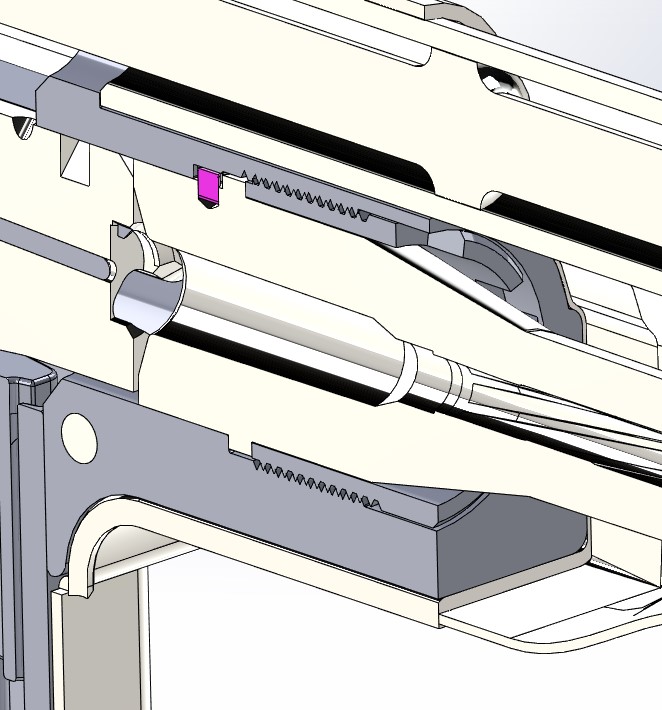
“This is all well and good guys, but how do you offer multiple calibers in a rifle with a pinned barrel?” you may ask. Therein lies one of the largest engineering changes with this weapon. Instead of a pressed barrel we have one that will slide into the trunnion. On the barrel is a barrel nut (think AR15 castle nut style) with external threads, the trunnion has internal threading which matches the nut. So, we slide the barrel in until the index pin is aligned and the barrel bottoms out against the shelf inside the trunnion (The highlighted area in the cut away render below).

Once the barrel has been inserted we then begin to screw the barrel nut into the trunnion, which will lock the barrel into place (a render of the nut fully locking the barrel in is below). The barrel nut has “ears” cut into the side closest to the muzzle allowing for a custom tool (included with conversion kit) to be inserted and either lock or unlock the nut.
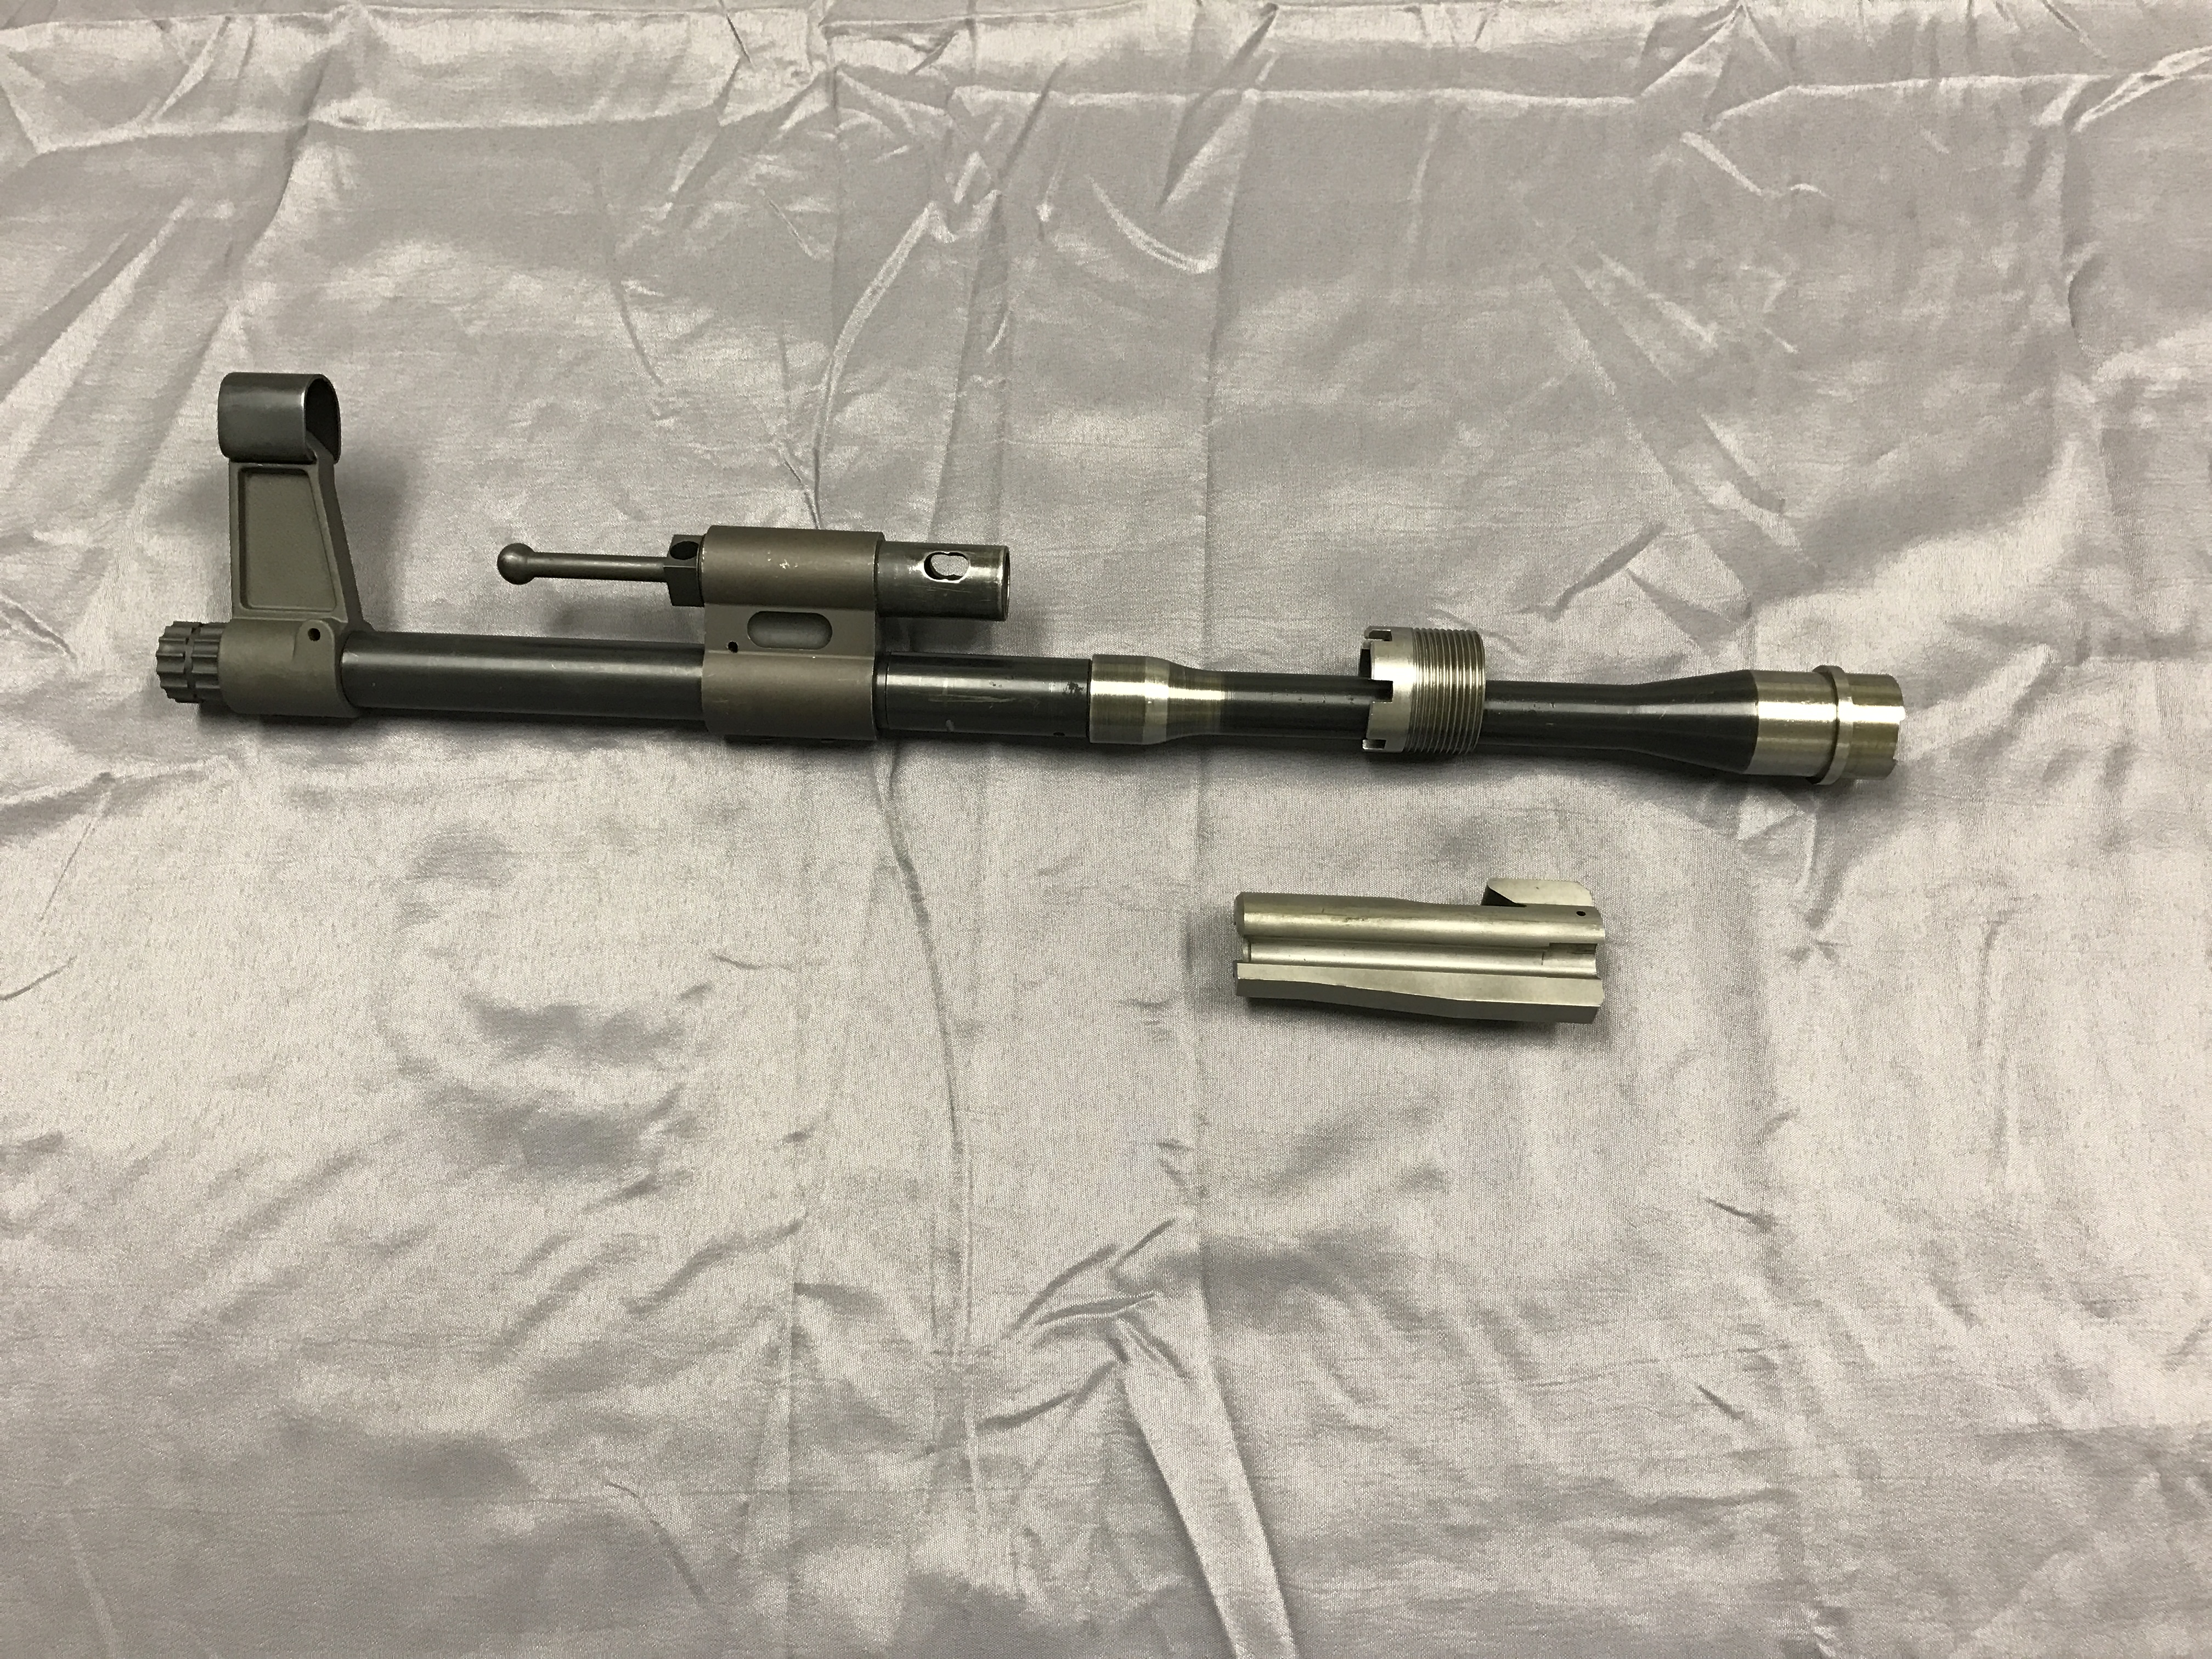
The next inevitable issue with changing barrels is how do we control head-space in a way that is safe and reliable. All our bolts are the exact same profile regardless of caliber. The only thing that changes is the bolt face cut (for different rim sizes and case seating depths). Thanks to modern manufacturing allowing repeatable precision when it comes to making multiples of the same part, we have the ability to hold every part made to strict tolerances time and time again. This coupled with the fact that the barrel goes to the same spot every time ensures that no matter what HMG StG™ bolt or barrel we install the head-space will stay consistent allowing for safe operation (Obviously please ensure you have the proper caliber bolt for the corresponding barrel or else you’re going to have a very bad day #YourGunWillExplode). Neat huh? The bolt carrier and piston stay the same regardless of caliber so quite literally the only two things you need to change are the bolt and barrel (The only time the piston would change is converting between barrel lengths). Non-rendered examples of the barrel assembly and the hand guard that covers and hides the barrel nut area.
With a conversion kit, you will receive a new barrel assembly, new bolt and (1) magazine corresponding to your new caliber. The bolt will come complete with thread protector, front sight, gas block w/ stacking swivel, and a barrel nut. You will simply remove the handguard, loosen the old barrel nut, remove the old barrel assembly, insert the new barrel assembly (which is aligned by the gas tube and alignment pin), tighten the barrel nut down, reattach the handguard, insert the new bolt, click your heels together three times while singing the intro song to Duck Tales (ITS A DUCK BLUR) and boom! Your caliber has been changed and you’re off to the races shooting again. With some practice, you can get this down to less than 5 minutes, meaning changing on the firing line is a definite possibility.
That’s it for this week, I hope that you guys enjoyed this peek into the gun. Going forward I want to continue breaking down the HMG StG™ and showing a more in-depth look then most of you have seen before. Have a great weekend and as always feel free to contact us with any questions or comments!
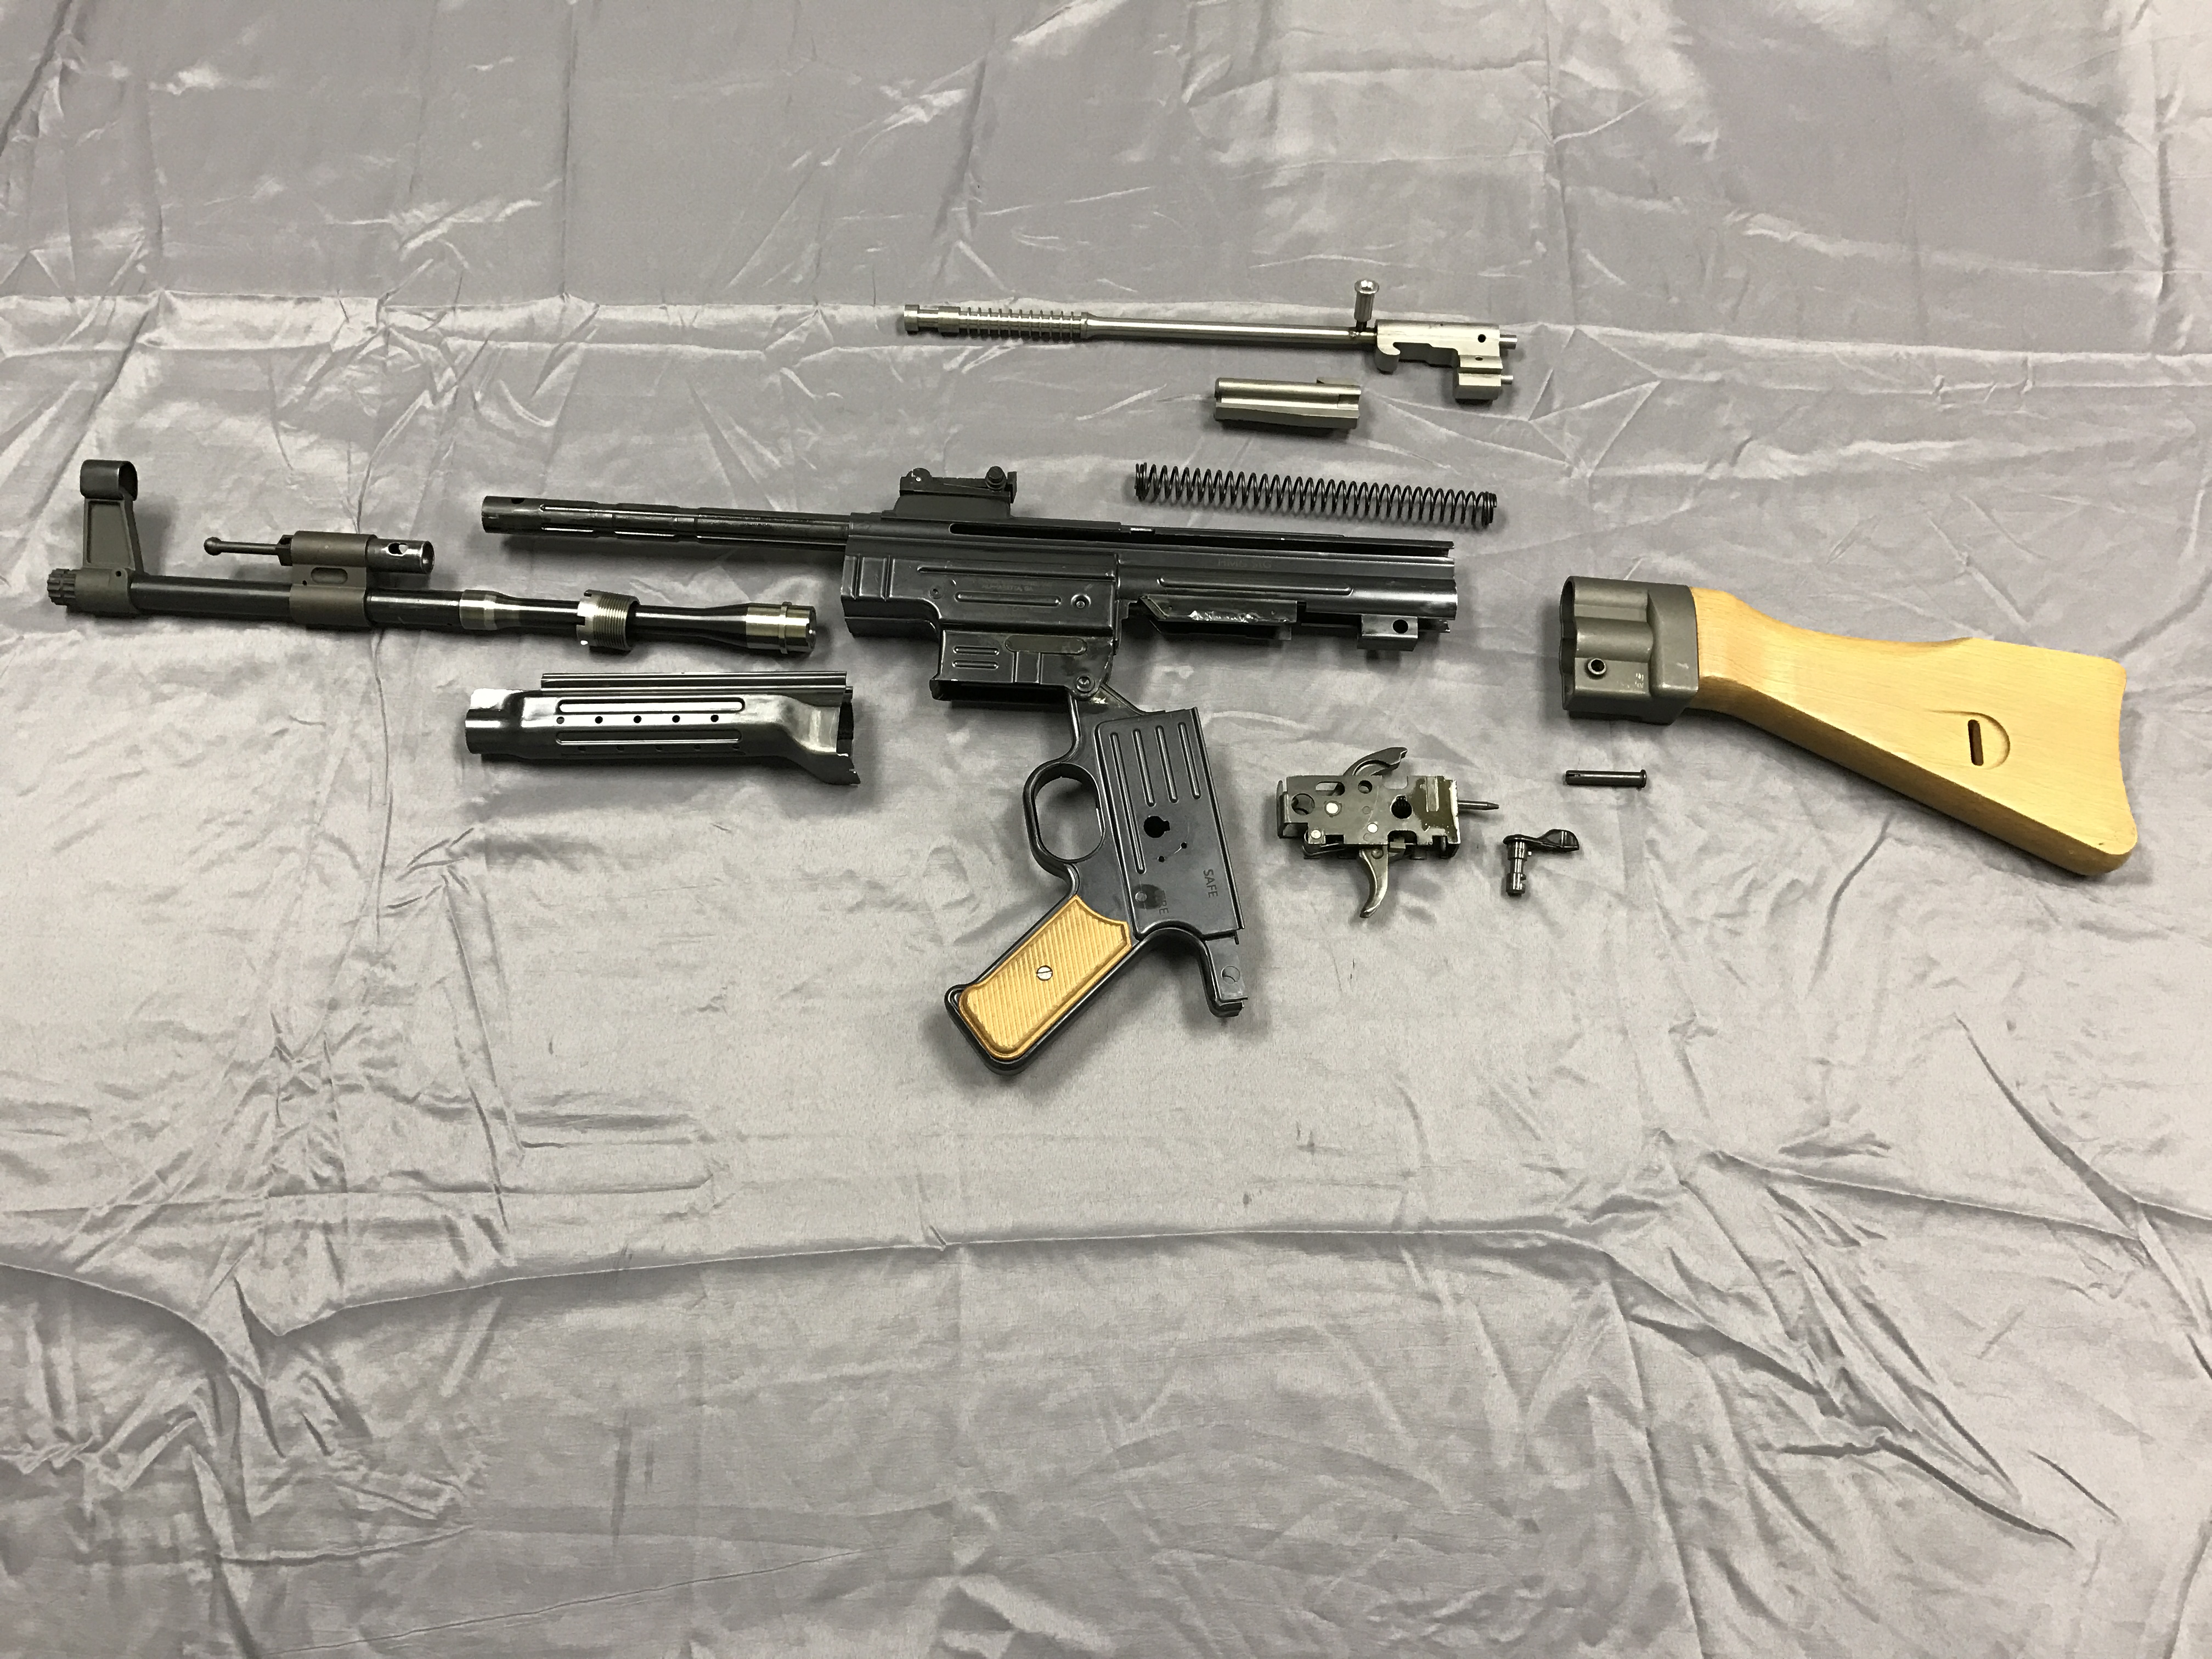
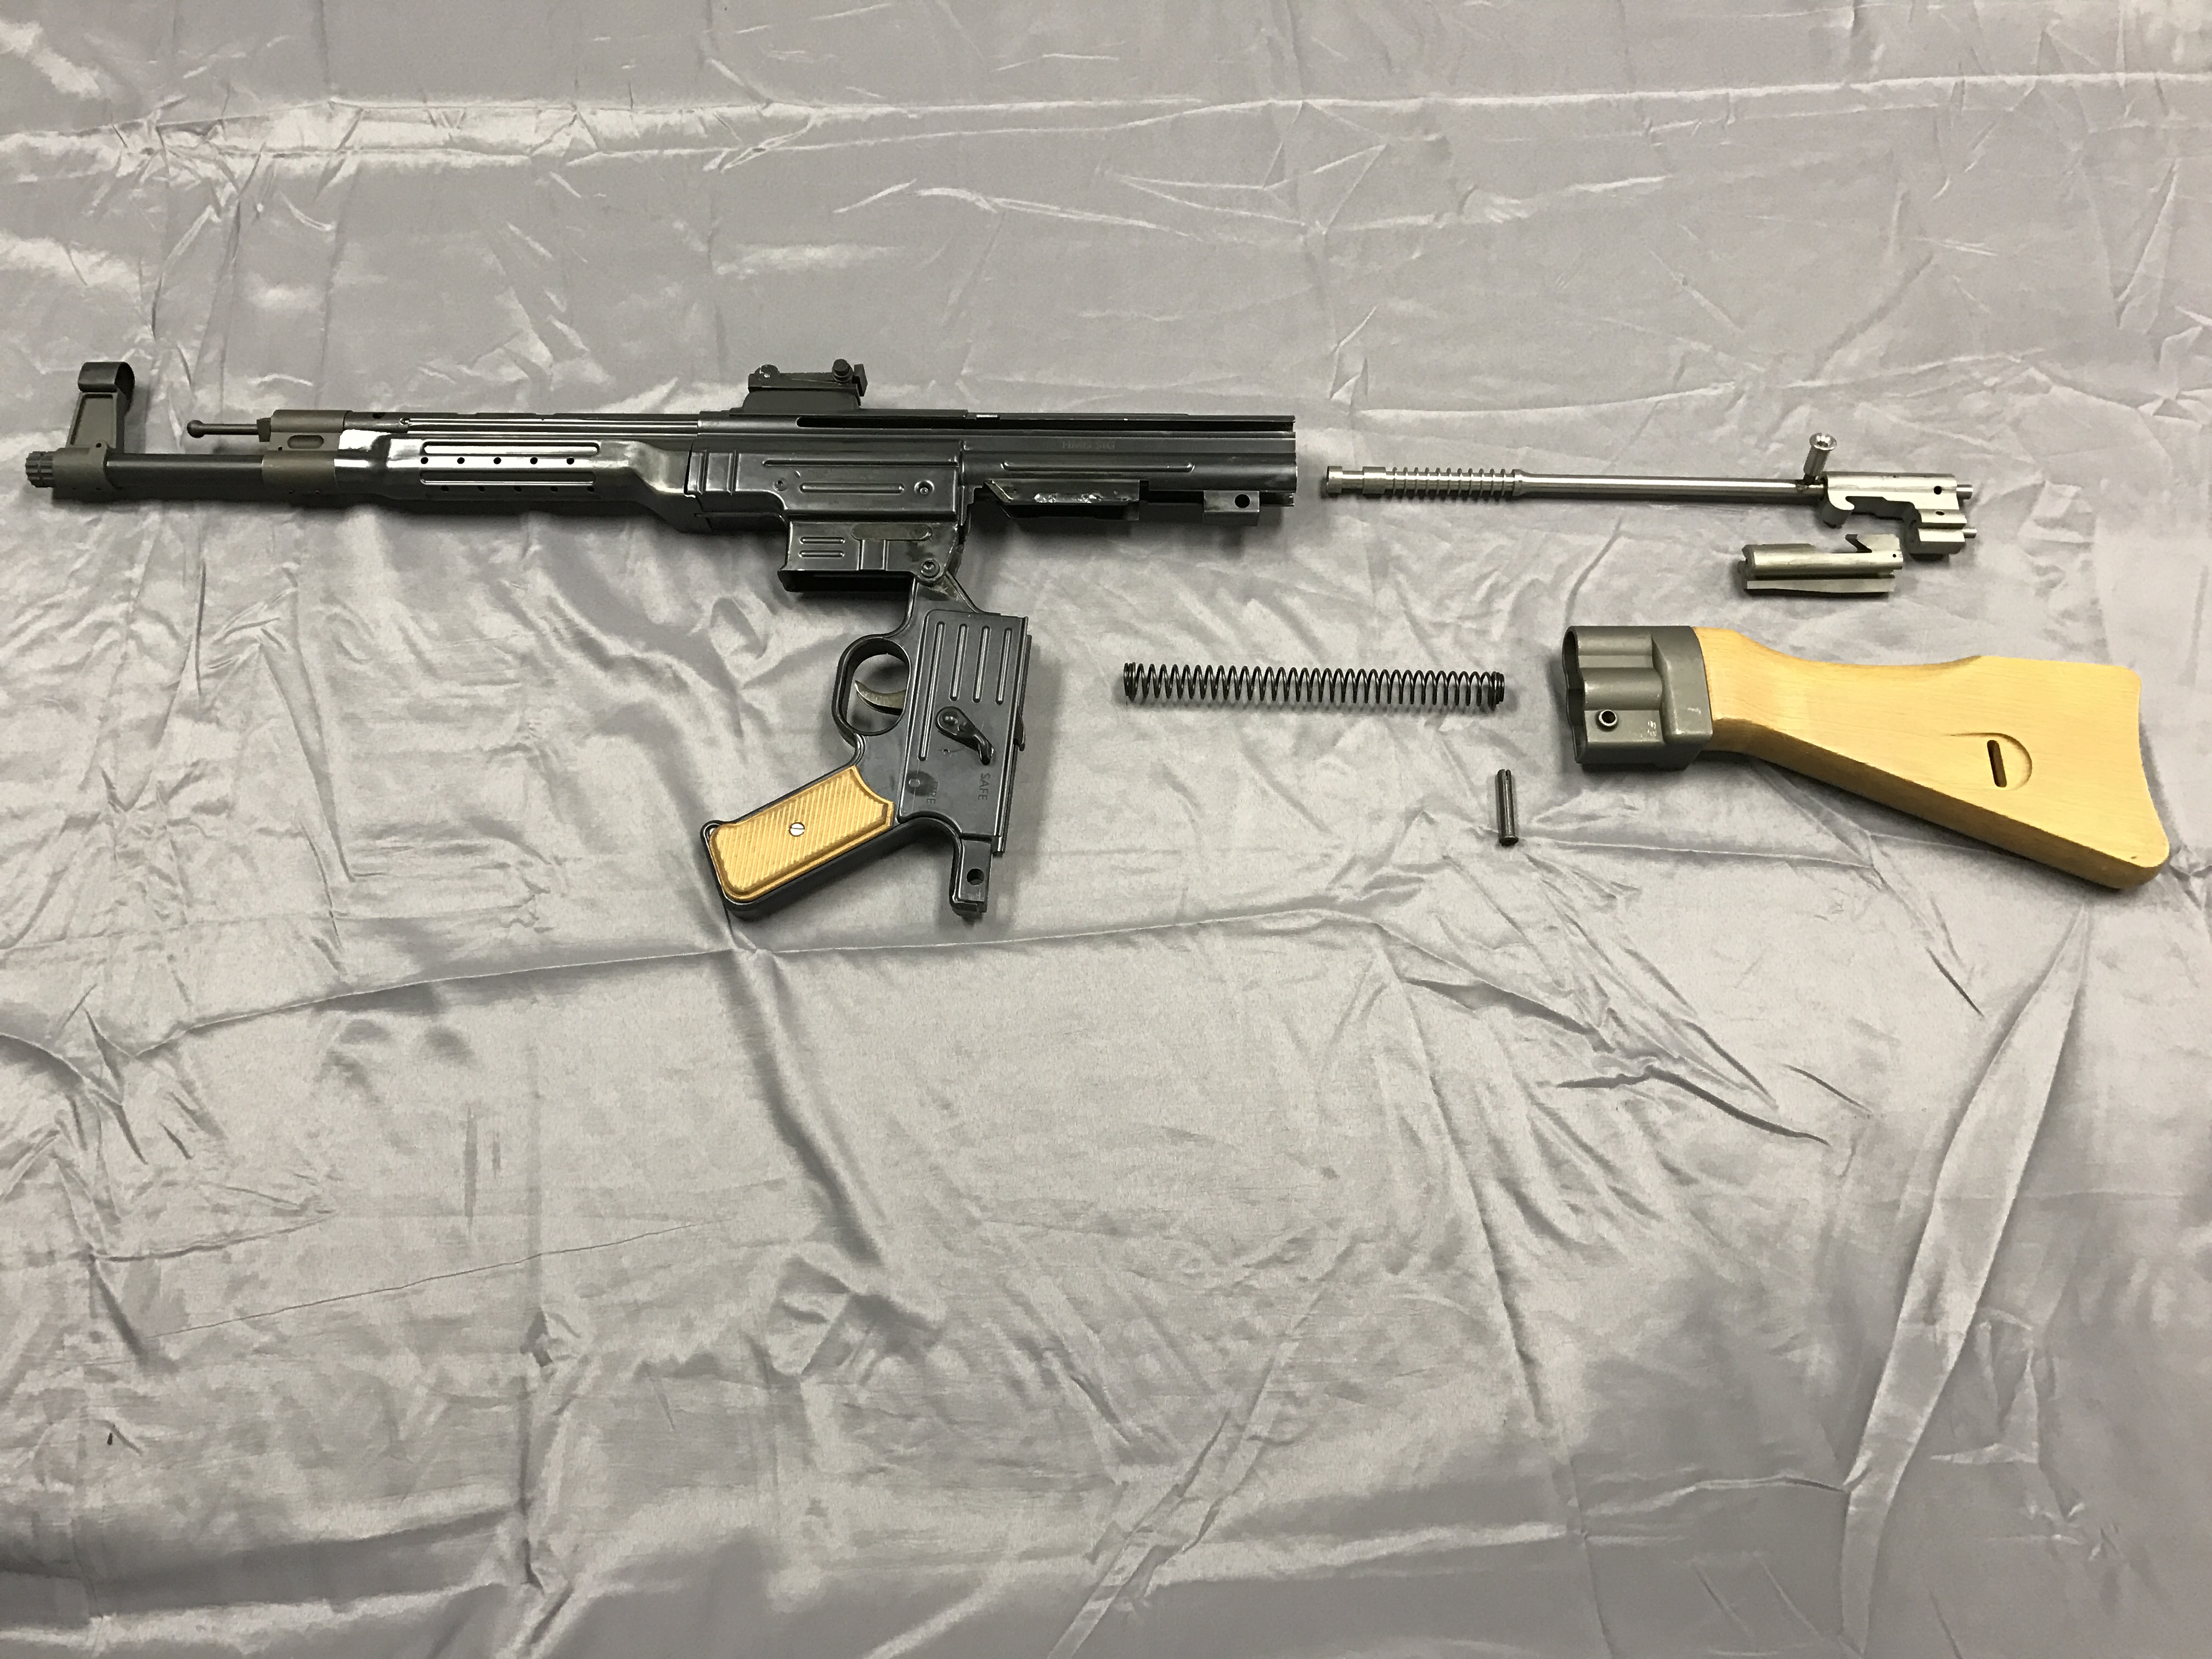
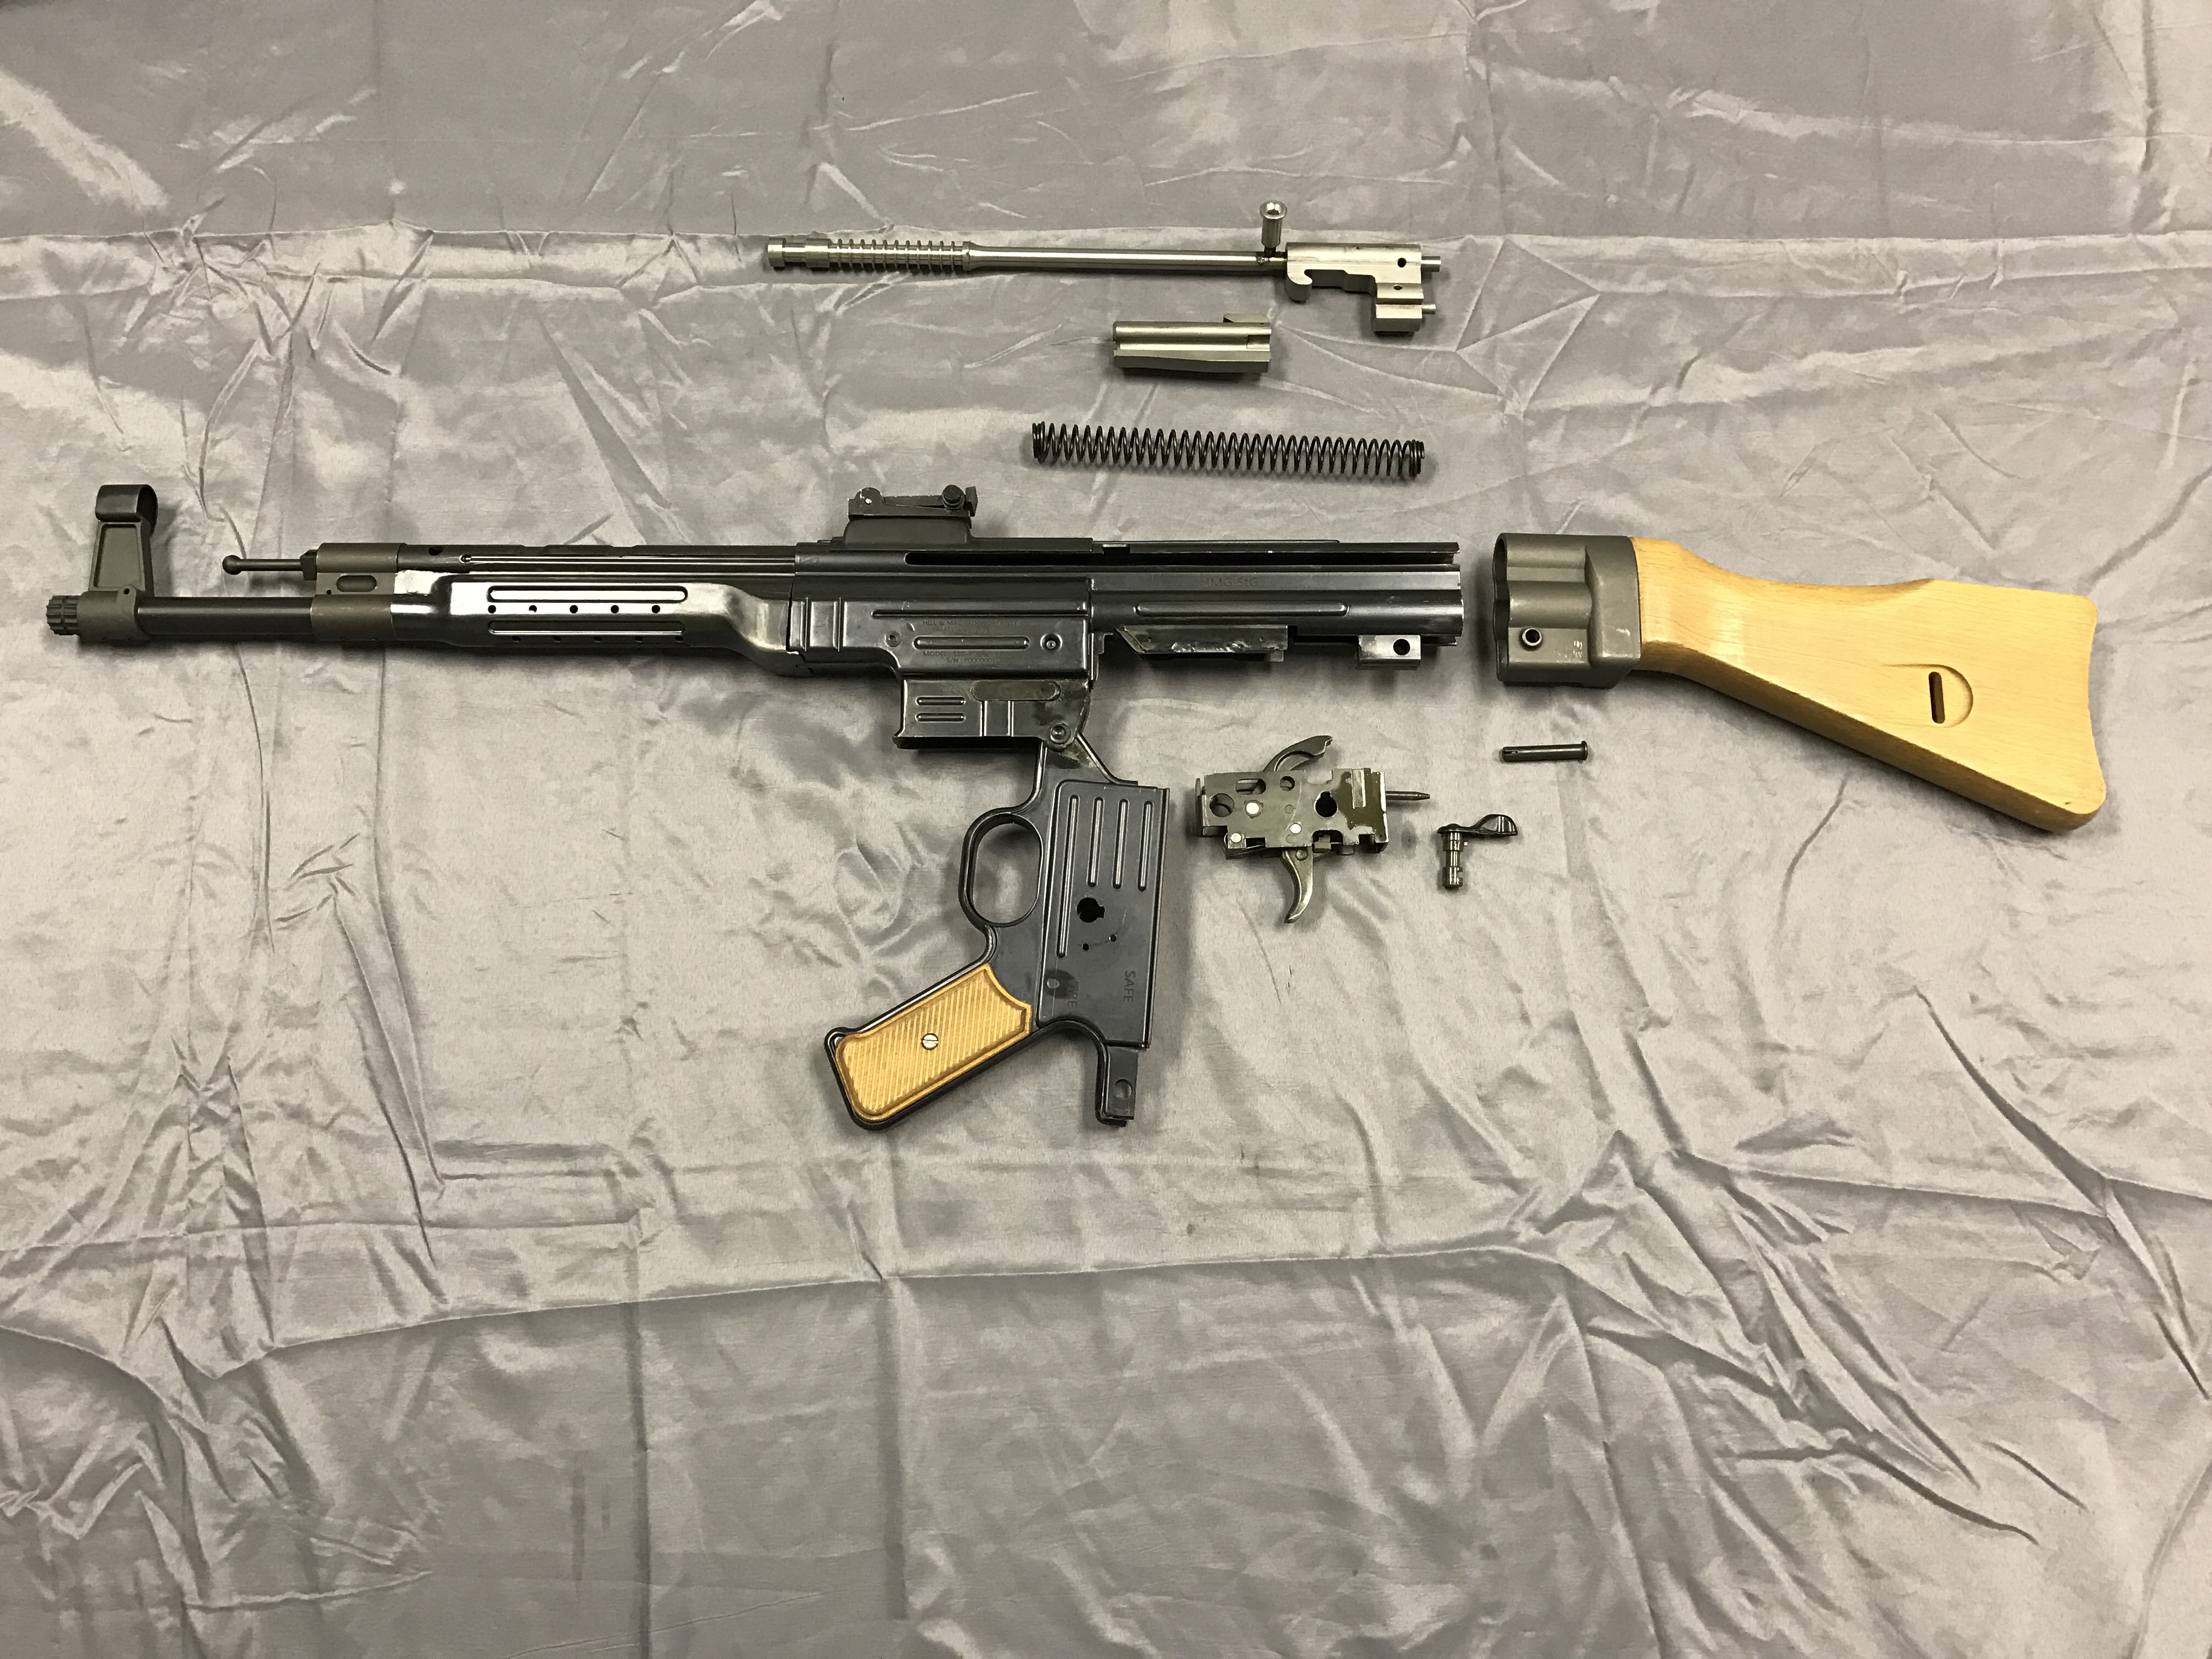
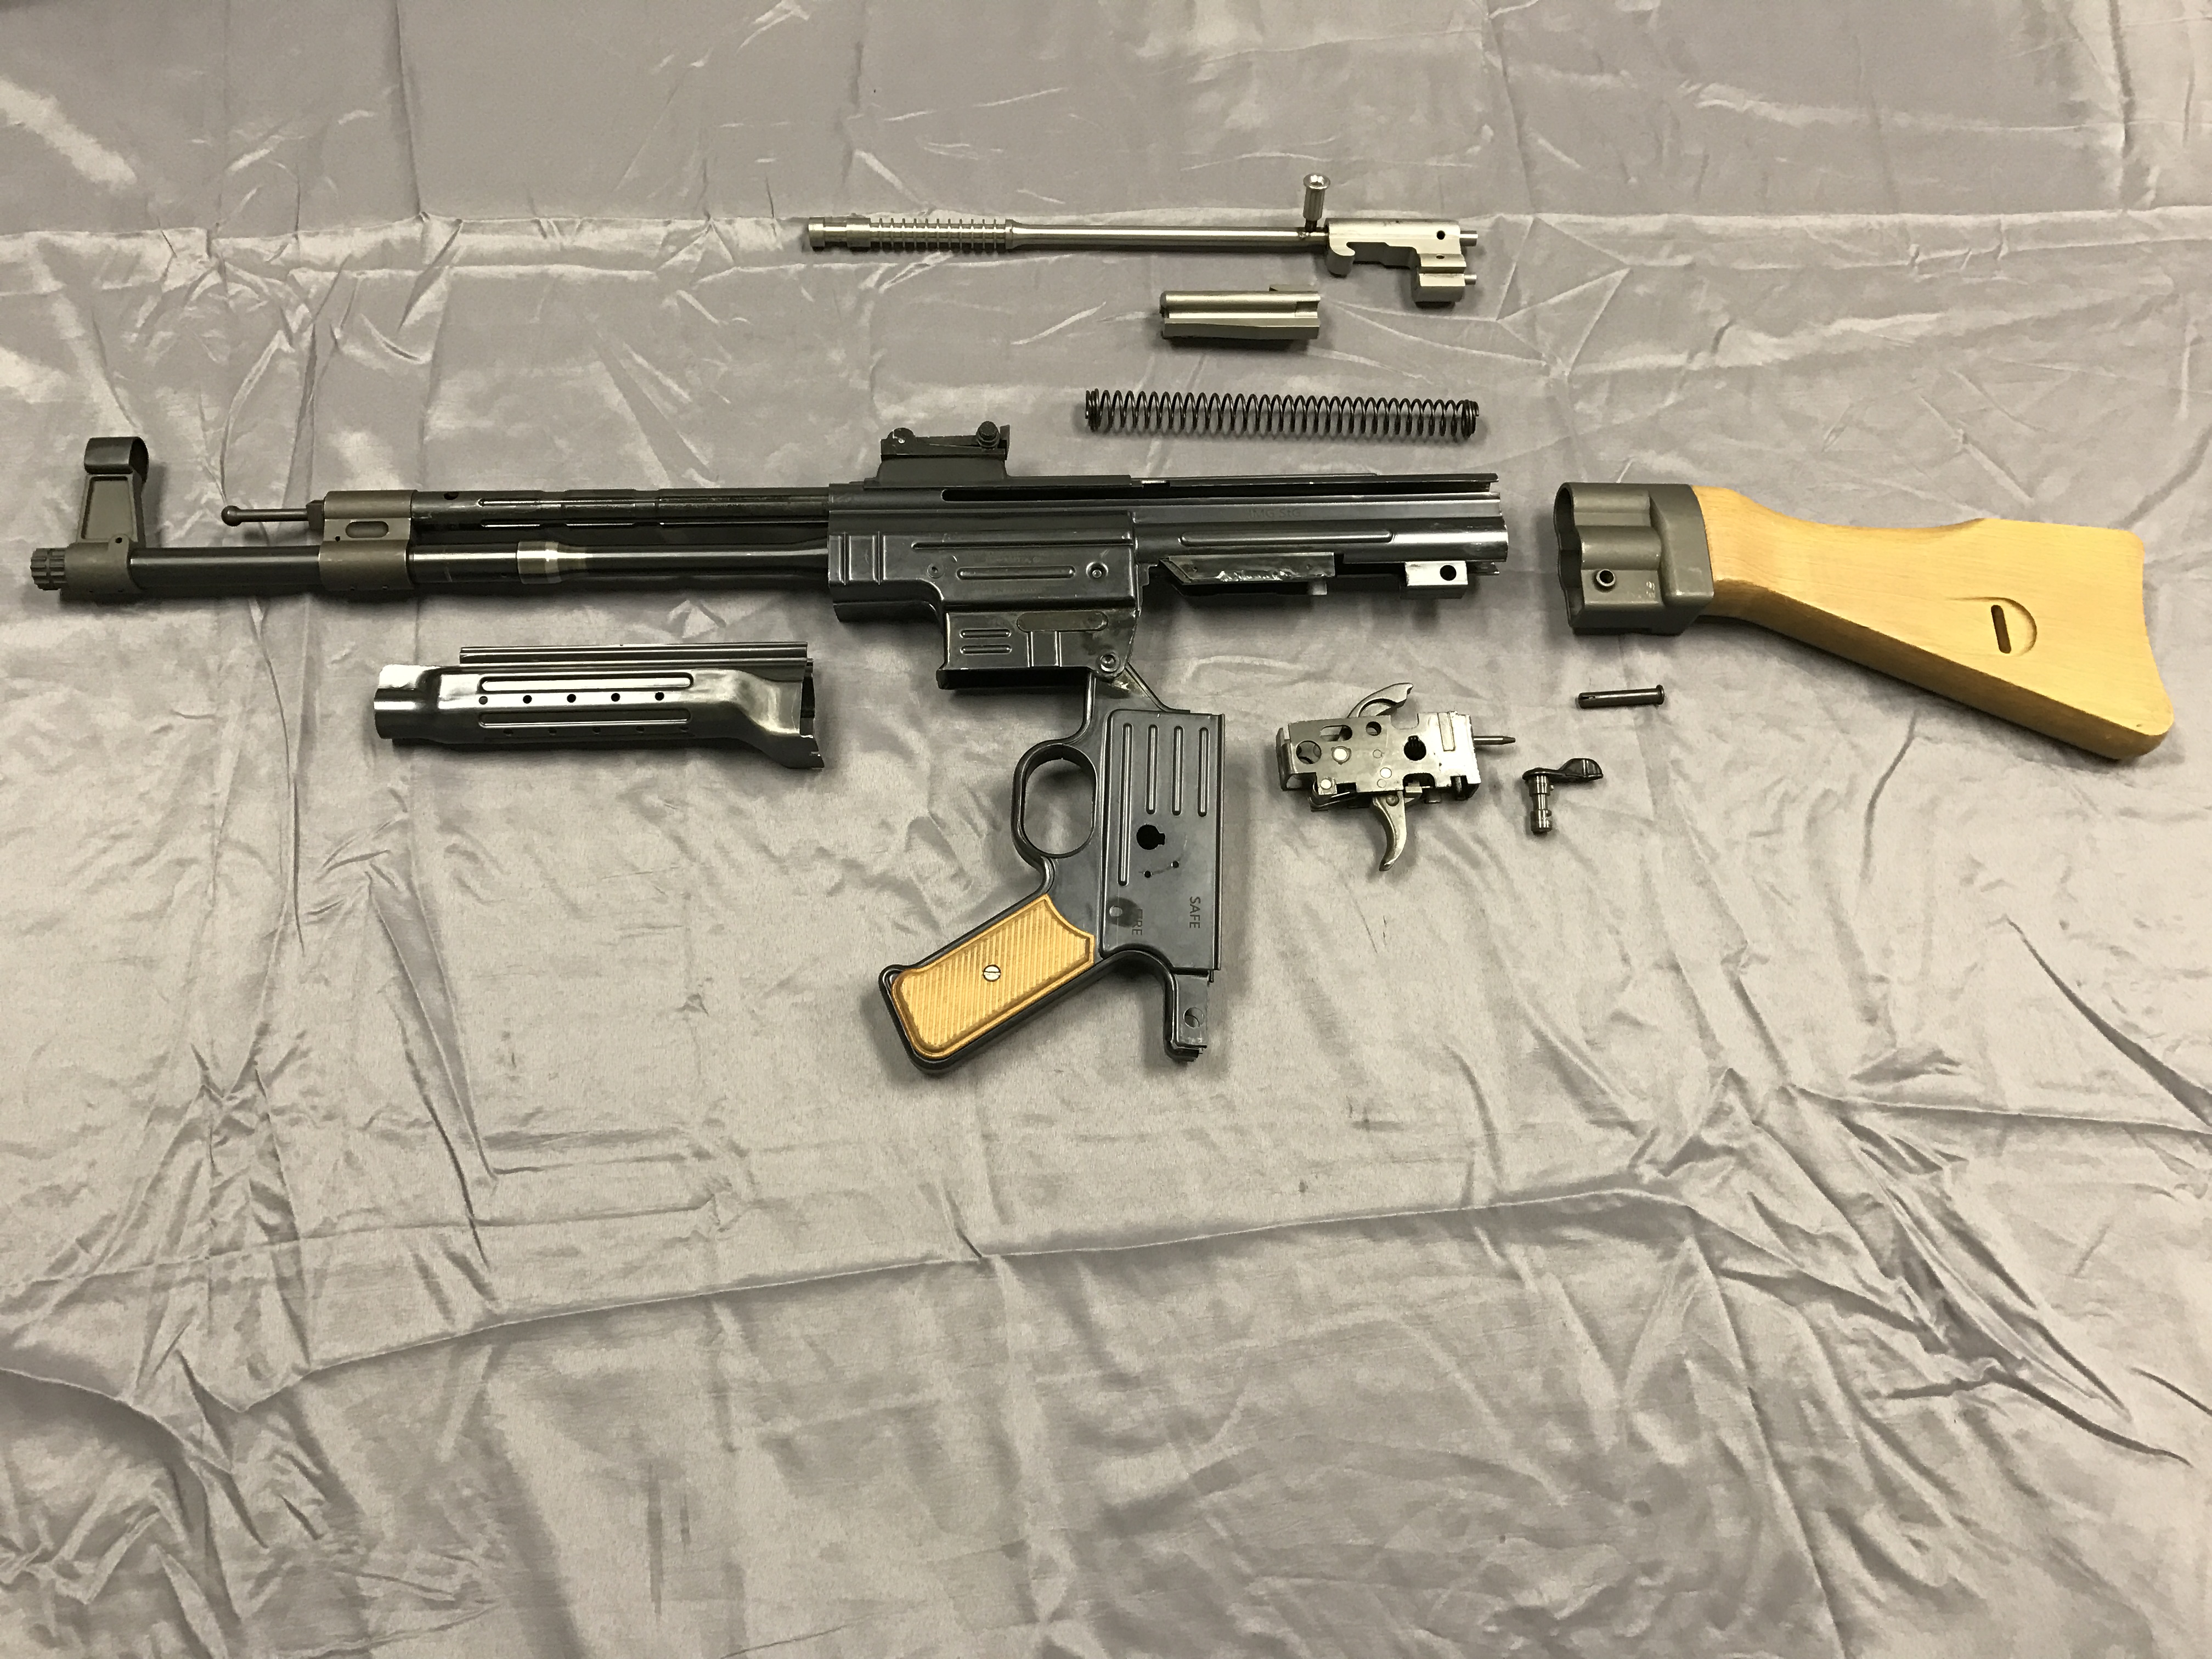
As a treat below are some additional pictures of our shop StG broken down piece by piece. Excuse the roughness in some areas, we beat our guns up to ensure you don’t 🙂
-Travis